Embarking on the journey of an All-on-4 dental implant procedure is a transformative step towards regaining a confident smile and optimal oral function. These innovative full-arch restorations offer a permanent solution for those with extensive tooth loss, providing stability and aesthetics that rival natural teeth. However, the longevity and success of All-on-4 implants depend significantly on a meticulous and consistent all-on-4 dental implant cleaning routine. Unlike natural teeth, implants are not susceptible to cavities, but they are vulnerable to peri-implantitis, an inflammatory condition similar to gum disease that can jeopardize the implant’s stability. Therefore, understanding and implementing the correct cleaning protocols is paramount for safeguarding your investment and ensuring a lifetime of healthy, beautiful smiles. This comprehensive guide will equip you with the knowledge and tools necessary to maintain your All-on-4 implants with expert precision in 2026.
Key Takeaways
- Daily meticulous cleaning is crucial: An effective all-on-4 dental implant cleaning routine is essential to prevent plaque buildup and peri-implantitis.
- Specialized tools are a must: Regular toothbrushes are often insufficient; invest in soft-bristle brushes, interdental brushes, and a water flosser.
- Technique over brute force: Gentle, thorough cleaning, focusing on the areas around the implant posts and under the prosthetic, is key.
- Regular professional care is non-negotiable: Dental check-ups and professional cleanings are vital for long-term implant success.
- Listen to your body: Any signs of pain, redness, or bleeding around your implants warrant immediate dental consultation.
Understanding the Unique Needs of All-on-4 Implants
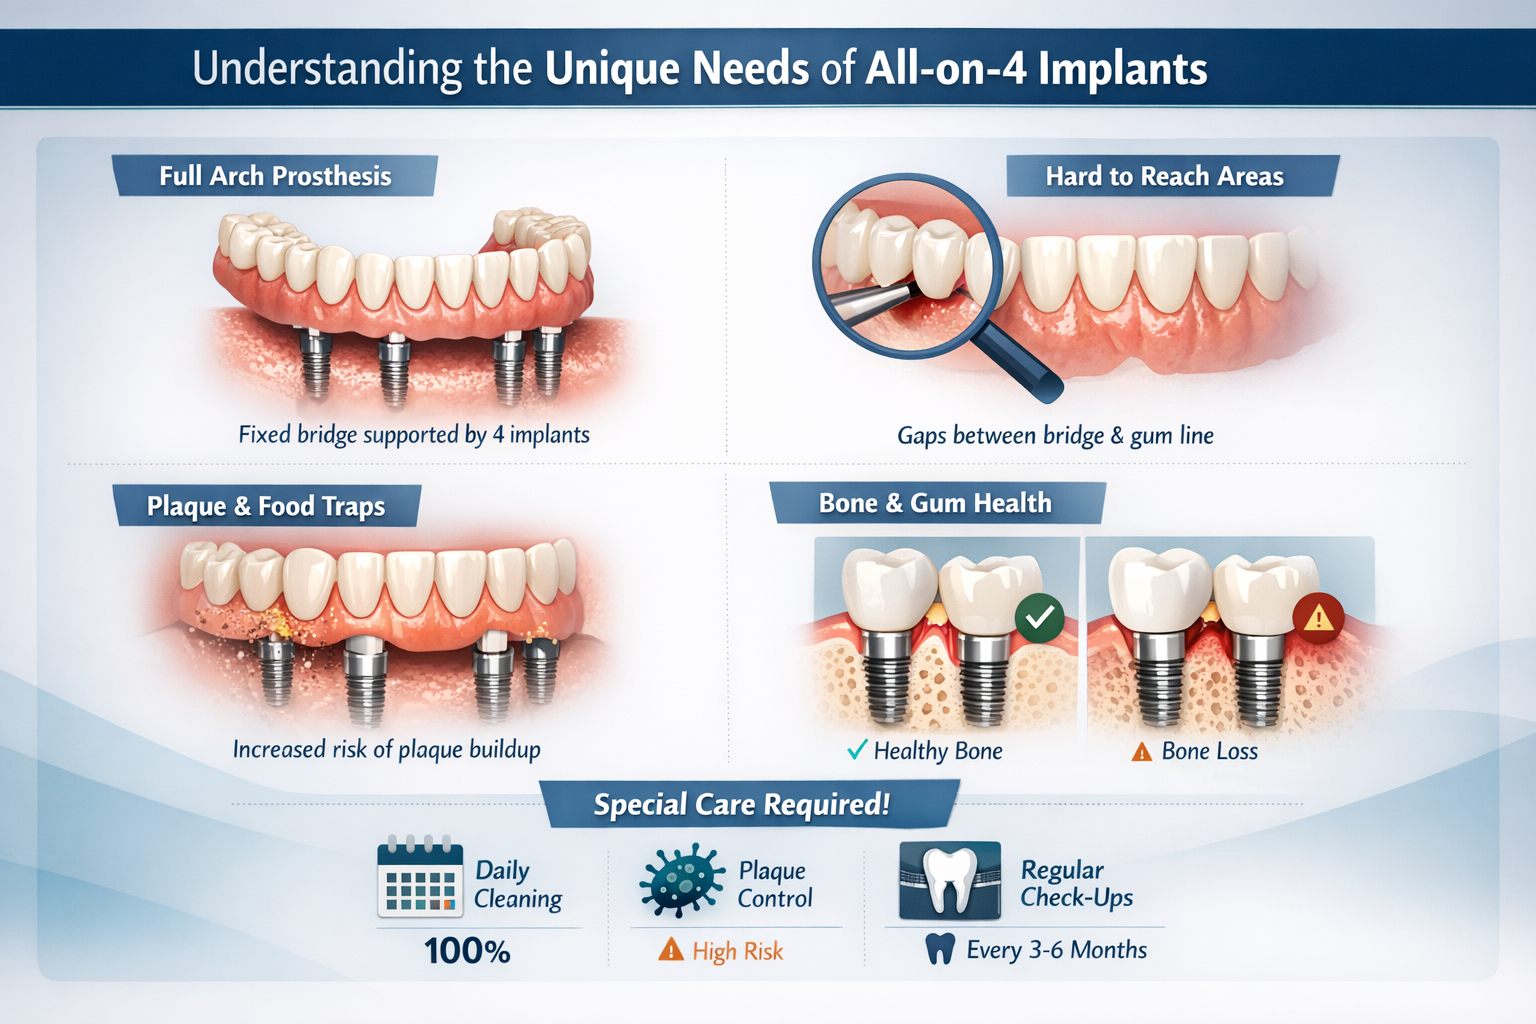
All-on-4 dental implants consist of a full arch of prosthetic teeth, typically a bridge, supported by four strategically placed dental implants in the jawbone. This design means there are specific areas that require diligent attention during cleaning that differ from natural teeth or traditional dentures. The primary concern is the space between the prosthetic bridge and the gum line, as well as around the implant posts themselves. These areas can easily trap food particles and plaque, leading to bacterial accumulation if not cleaned effectively. This bacterial buildup can, over time, lead to inflammation of the gum tissue surrounding the implants (mucositis) and, if left untreated, progress to peri-implantitis, a more severe condition involving bone loss around the implant [1].
Maintaining a consistent all-on-4 dental implant cleaning routine is not just about aesthetics; it’s about preventing serious complications that could compromise the integrity of your implants. Neglecting proper hygiene can lead to implant failure, requiring costly and complex remedial treatments. Therefore, viewing your cleaning routine as an integral part of your overall health strategy is crucial.
Essential Tools for Your All-on-4 Dental Implant Cleaning Routine
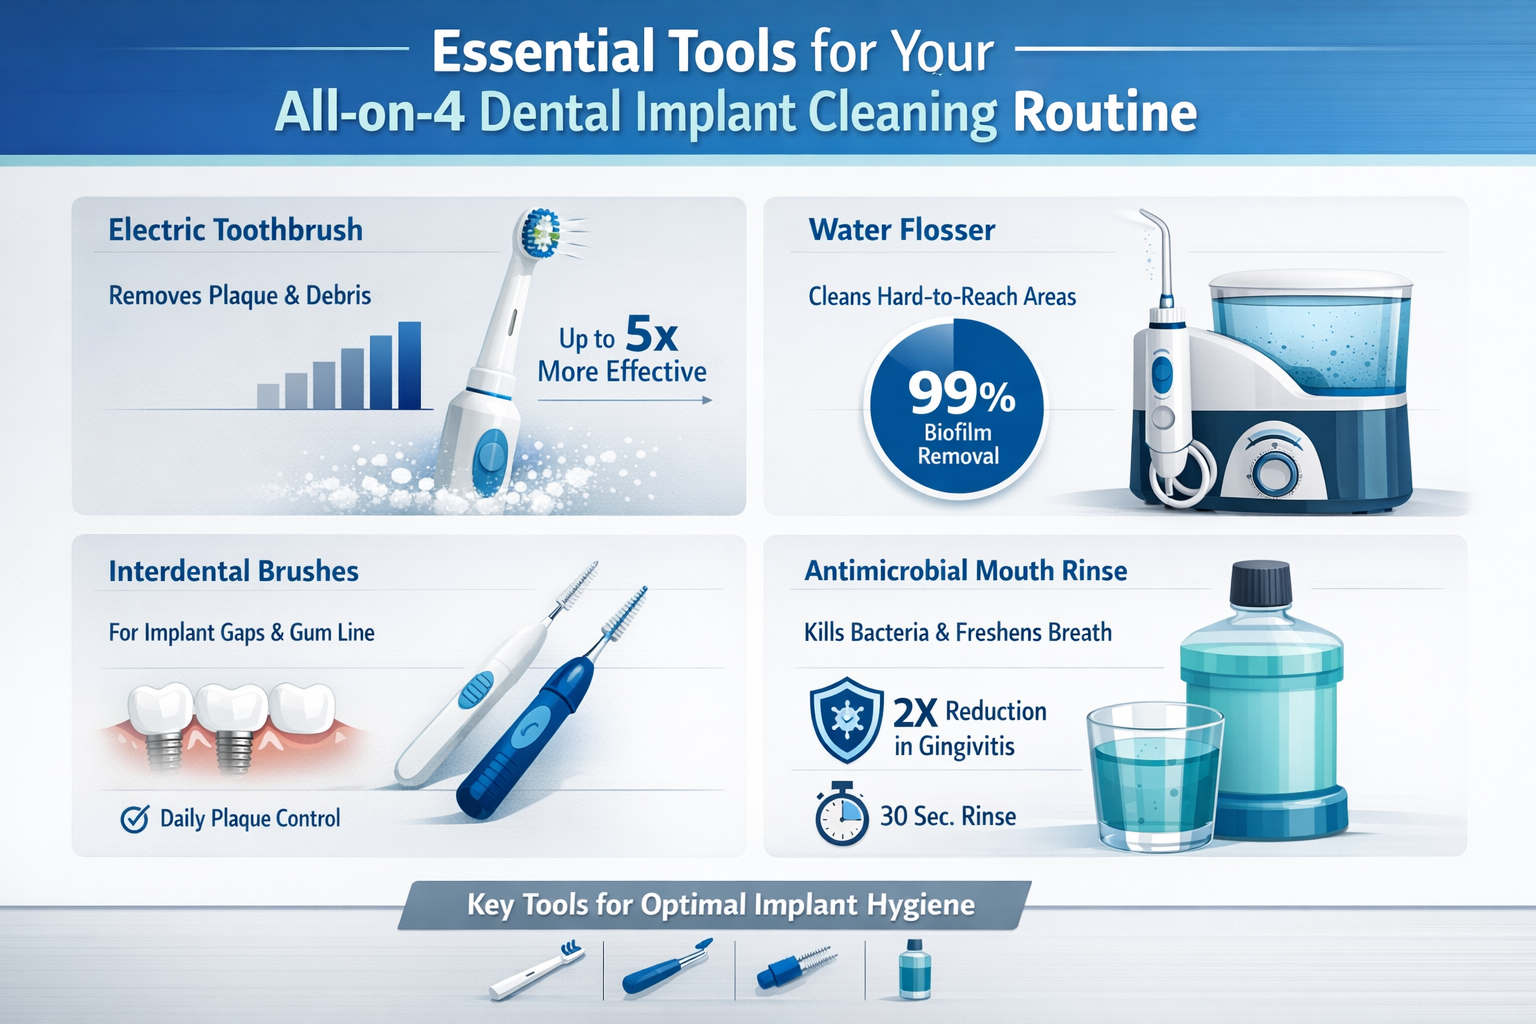
Achieving a truly clean set of All-on-4 implants requires more than just a standard toothbrush and toothpaste. Specialized tools are designed to effectively reach the unique contours and spaces associated with implant-supported prosthetics. Investing in the right arsenal of cleaning aids will make your daily routine more effective and efficient.
Here’s a breakdown of the essential tools you should incorporate into your all-on-4 dental implant cleaning routine:
Soft-Bristle Toothbrush:
- Why it’s essential: A soft-bristle toothbrush is gentle on the delicate gum tissue around your implants and on the prosthetic surface. Hard bristles can scratch the prosthetic material or irritate the gums, potentially leading to inflammation.
- Recommendation: Opt for a manual toothbrush with extra-soft bristles or a high-quality electric toothbrush with a sensitive setting and a soft brush head.
- Technique: Use small, circular motions, angling the bristles gently towards the gum line where the prosthetic meets your gums. Be sure to clean all surfaces of the prosthetic teeth.
Water Flosser (Oral Irrigator):
- Why it’s essential: This is arguably the most critical tool for cleaning All-on-4 implants. A water flosser uses a stream of pulsating water to dislodge food particles and plaque from under the prosthetic arch and around the implant posts, areas that traditional floss cannot reach effectively.
- Recommendation: Choose a water flosser with adjustable pressure settings. Some models come with specialized tips for implants.
- Technique: Direct the water stream at a 90-degree angle to the gum line, tracing along the entire base of the prosthetic. Pay particular attention to the areas where the bridge meets the gums and around each implant abutment. Start with a lower pressure setting and gradually increase it as you become comfortable. For more information on choosing the best option, read about the best water flosser for dental implants.
Interdental Brushes/Proxabrush:
- Why it’s essential: These small brushes, shaped like tiny pipe cleaners, are excellent for cleaning in between the individual prosthetic teeth and around the implant posts, particularly if there are small gaps.
- Recommendation: Your dentist or hygienist can recommend the appropriate size for your specific prosthetic.
- Technique: Gently insert the brush into any accessible spaces and move it back and forth a few times to dislodge debris. Avoid forcing the brush into tight spaces.
Dental Floss (Super Floss or Implant Floss):
- Why it’s essential: While a water flosser is primary, specialized dental floss can complement your routine by cleaning larger accessible areas and polishing surfaces.
- Recommendation: Look for “Super Floss” or floss specifically designed for implants, which often has a stiffened end to thread under the bridge and a spongy section for cleaning.
- Technique: Carefully thread the floss under the prosthetic bridge and use a shoe-shine motion to clean the underside of the bridge and around the implant posts. Be gentle to avoid damaging the gum tissue.
Non-Abrasive Toothpaste:
- Why it’s essential: Abrasive toothpastes can scratch the surface of your prosthetic teeth, making them more prone to staining and plaque accumulation.
- Recommendation: Use a gel-based, non-abrasive toothpaste. Many brands offer toothpastes specifically formulated for dental implants. You can find out more about ideal products in articles about the best toothpaste for all-on-4 implants.
- Avoid: Whitening toothpastes containing harsh abrasives or bleaching agents.
Antimicrobial Mouthwash (Alcohol-Free):
- Why it’s essential: An alcohol-free antimicrobial mouthwash can help reduce bacteria in your mouth and freshen your breath without drying out oral tissues, which can be detrimental to implant health.
- Recommendation: Consult your dentist for a recommended brand or type. Many specific rinses are available for implant patients.
- Technique: Swish as directed on the product label after brushing and flossing. For a deeper dive, explore options for the best mouthwash for dental implants.
Your Daily All-on-4 Dental Implant Cleaning Routine: Step-by-Step
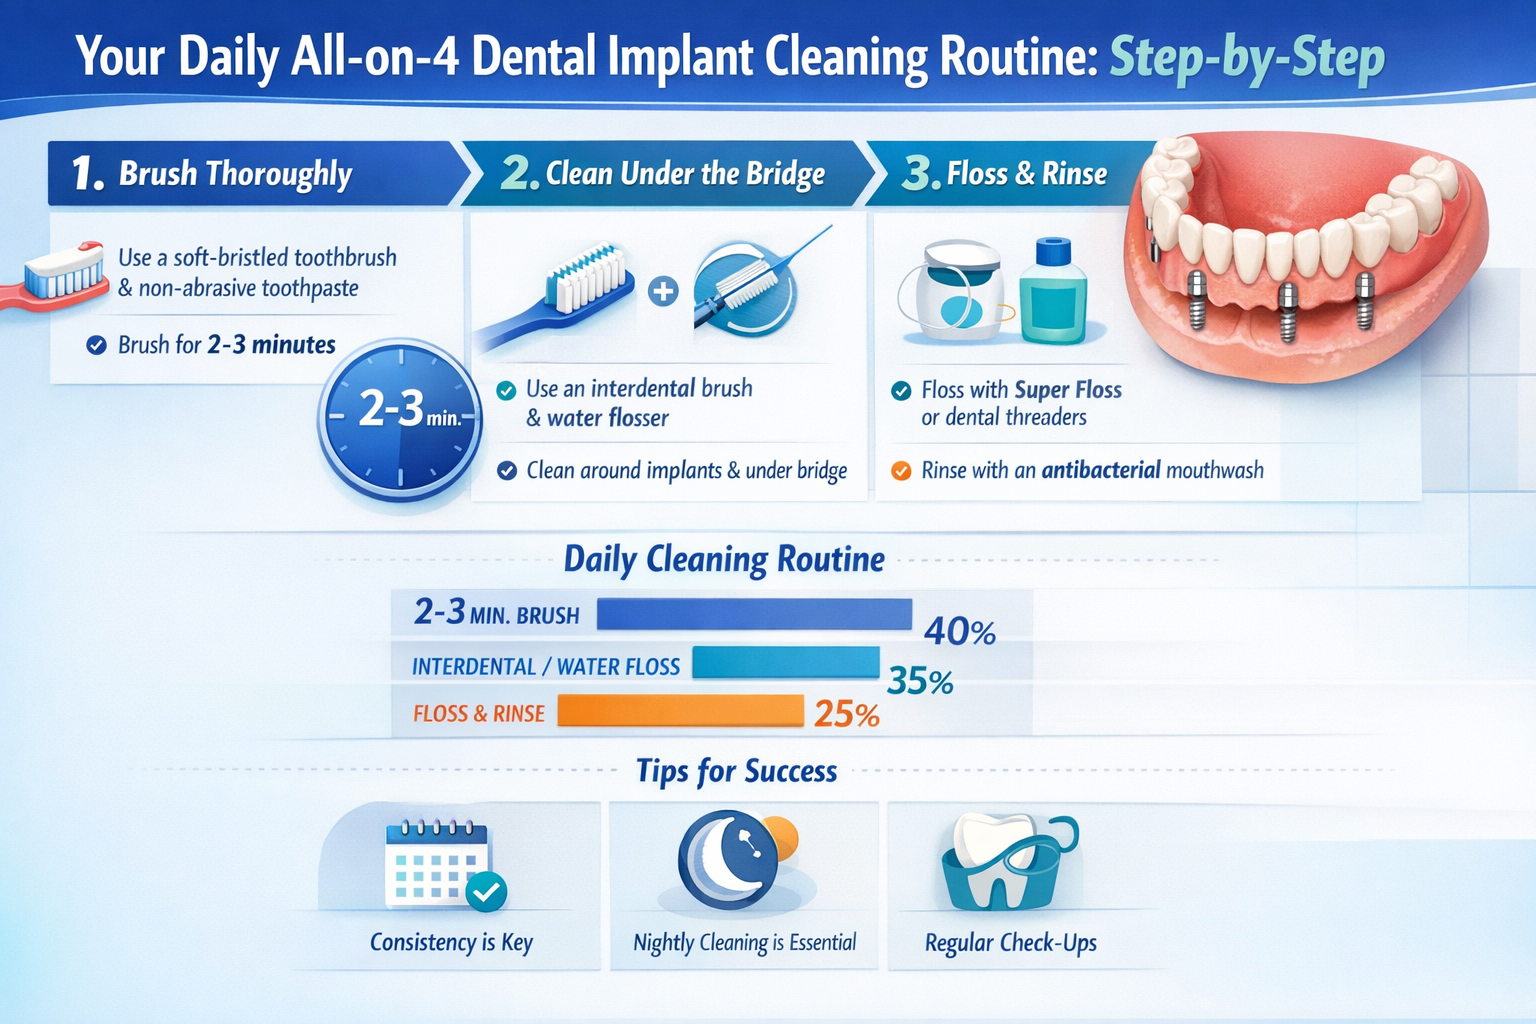
Consistency is key to the success of your all-on-4 dental implant cleaning routine. This routine should ideally be performed at least twice a day, preferably after breakfast and before bed.
Here’s a detailed step-by-step guide:
Morning Routine (After Breakfast):
- Water Flossing: Begin by using your water flosser. Fill the reservoir with warm water (and an antimicrobial rinse if recommended by your dentist). Direct the stream at the junction of your prosthetic and gum line, moving slowly and deliberately along the entire arch. Ensure you clean both the outer (buccal) and inner (lingual) surfaces. This step is crucial for dislodging food particles and plaque from under the bridge.
- Brushing with Soft-Bristle Toothbrush: Apply a pea-sized amount of non-abrasive toothpaste to your soft-bristle toothbrush. Angle the brush at about 45 degrees towards the gum line, gently brushing all surfaces of your prosthetic teeth (outer, inner, and chewing surfaces) using small, circular motions. Be thorough but gentle, paying close attention to the gum line.
- Interdental Brushing (if applicable): If you have any small gaps between your prosthetic teeth or around the implant posts, use an appropriately sized interdental brush to clean these areas. Gently insert and move back and forth.
- Rinsing: Swish with an alcohol-free antimicrobial mouthwash for 30-60 seconds to help reduce any remaining bacteria.
Evening Routine (Before Bed):
- Water Flossing: Repeat the water flossing step exactly as you did in the morning. This is especially important at night to remove all food debris accumulated throughout the day.
- Brushing with Soft-Bristle Toothbrush: Brush your prosthetic teeth thoroughly with a non-abrasive toothpaste, focusing on all surfaces and the gum line.
- Interdental Brushing (if applicable): Clean any accessible interdental spaces with your interdental brush.
- Specialized Flossing (if applicable): If recommended by your dentist, use Super Floss or implant-specific floss to clean under the bridge, paying close attention to areas that the water flosser might not have fully addressed.
- Rinsing: Conclude your evening all-on-4 dental implant cleaning routine with an alcohol-free antimicrobial mouthwash.
“A diligent all-on-4 dental implant cleaning routine is the cornerstone of long-term implant success. It’s not just about cleaning the teeth you see, but meticulously caring for the hidden foundations that support your new smile.” – Leading Dental Implant Specialist, 2026.
Advanced Tips and Considerations for Your All-on-4 Dental Implant Cleaning Routine

Beyond the daily essentials, there are additional considerations and advanced tips that can further enhance your all-on-4 dental implant cleaning routine and contribute to the longevity of your investment.
Dietary Habits and Their Impact
What you eat can significantly impact the cleanliness of your implants. While All-on-4 implants restore much of your biting and chewing ability, it’s wise to consider some dietary factors:
- Avoid overly sticky or hard foods: These can put undue stress on the prosthetic or become lodged in difficult-to-clean areas. After your procedure, you might need to stick to soft foods after dental implant for a period.
- Limit sugary and acidic foods/drinks: While implants don’t get cavities, these can contribute to an unhealthy oral environment that affects your gums and can encourage plaque formation.
- Stay hydrated: Drinking plenty of water helps rinse away food particles and maintains saliva flow, which is crucial for natural oral cleansing.
Regular Professional Maintenance
Your at-home all-on-4 dental implant cleaning routine is only one part of the equation. Regular visits to your dental professional are absolutely critical.
- Professional Cleanings: Unlike natural teeth, All-on-4 implants require specialized tools and techniques for professional cleaning. Your hygienist will use non-abrasive instruments made of plastic or graphite to clean around the implants without scratching their surfaces.
- Comprehensive Examinations: During these visits, your dentist will check the health of your gums, assess the stability of your implants, and ensure the prosthetic bridge is in good condition. They will also look for any early signs of peri-implantitis or other complications.
- X-rays: Periodically, X-rays will be taken to monitor the bone levels around your implants and detect any issues not visible to the naked eye.
- Frequency: Most dental professionals recommend cleanings and check-ups every 3 to 6 months. This schedule may vary based on your individual oral health needs and risk factors. To schedule your next check-up, you can contact a trusted provider like Dental Implants Dallas TX.
Recognizing Warning Signs
Being vigilant about your oral health means knowing what to look for. Contact your dentist immediately if you experience any of the following:
- Bleeding gums: While some minor bleeding might occur during aggressive flossing, persistent bleeding around your implants is a red flag.
- Redness or swelling: Inflammation of the gum tissue around the implants.
- Pain or tenderness: Any discomfort when chewing or touching the area around your implants.
- Pus discharge: A clear sign of infection.
- Loose-feeling prosthetic: If your bridge feels wobbly or loose, it could indicate an issue with the implants or the abutments.
- Bad breath (halitosis) that doesn’t go away: This can be a symptom of bacterial buildup and infection.
Early detection and intervention are key to successfully treating any complications related to your All-on-4 implants. Don’t wait for the problem to worsen; reach out to your dental professional promptly.
Addressing Common Challenges in All-on-4 Dental Implant Cleaning Routine
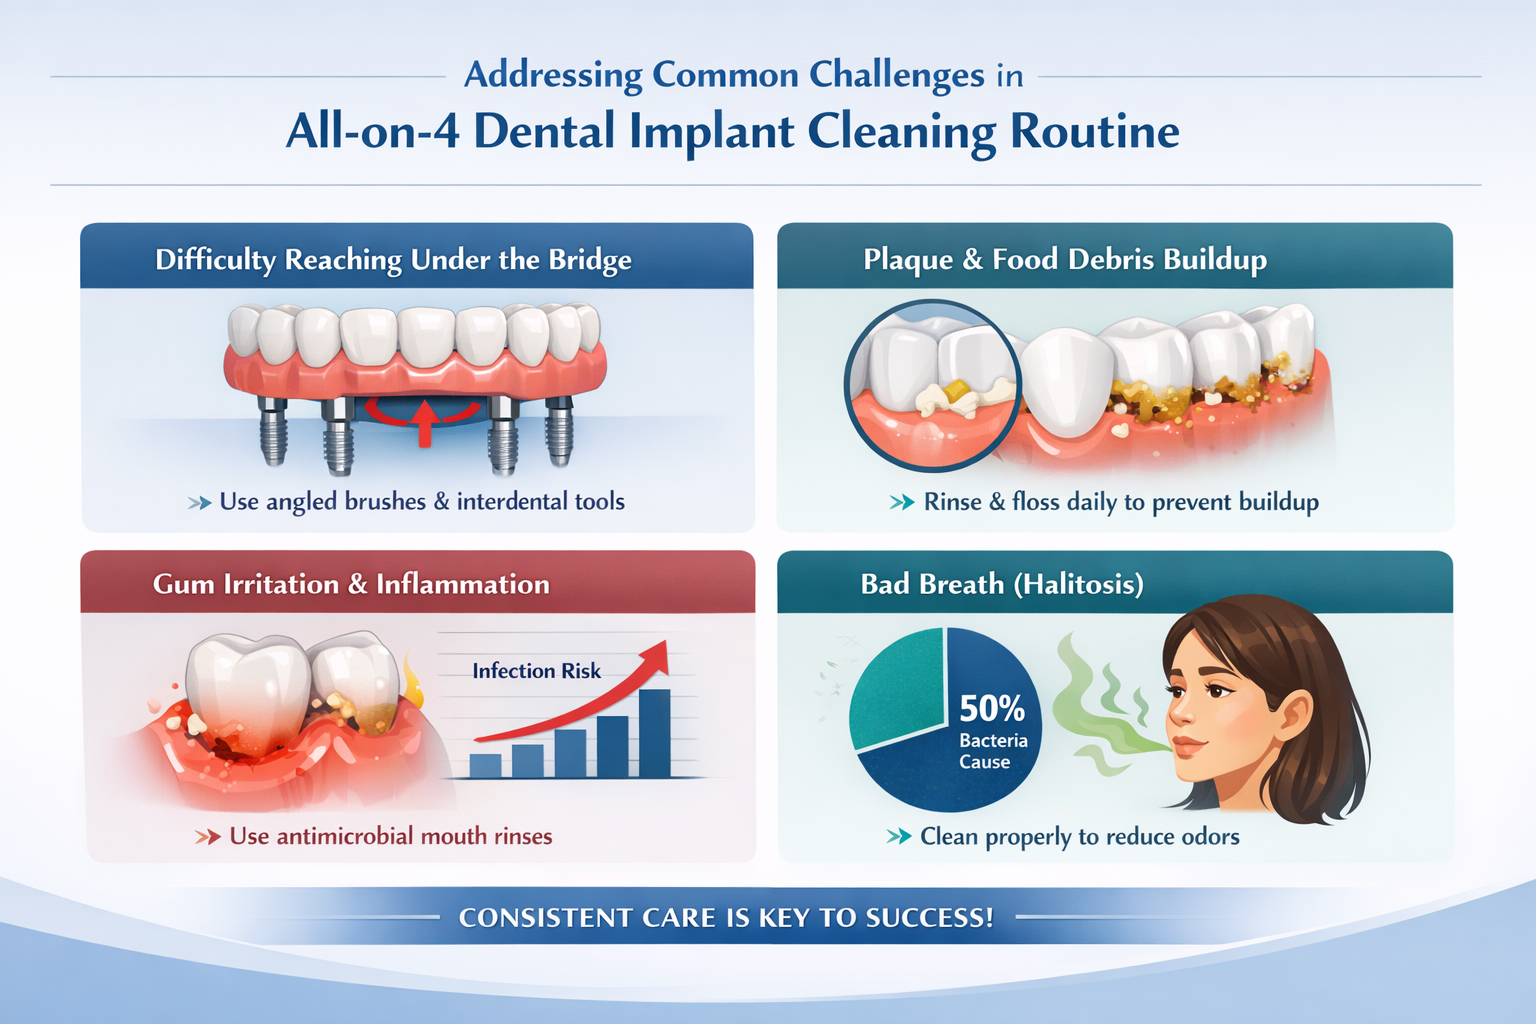
Even with the best intentions, maintaining your all-on-4 dental implant cleaning routine can present certain challenges. Understanding these common hurdles and their solutions can help you stay on track.
Challenge 1: Difficulty Reaching Under the Prosthetic
The space beneath the fixed prosthetic bridge can be tricky to clean thoroughly, leading to plaque accumulation.
- Solution: This is where the water flosser truly shines. Its targeted stream of water can effectively flush out debris from this critical area. Angle the nozzle correctly (generally 90 degrees to the gum line) and take your time moving along the entire arch. Specialized implant flossers with flexible tips can also be helpful.
- Pro Tip: Some dentists might recommend using a small amount of an antimicrobial rinse in your water flosser reservoir for an extra boost in bacterial control.
Challenge 2: Gum Irritation or Sensitivity
Aggressive brushing or improper use of cleaning tools can lead to irritated gums around your implants.
- Solution: Always use a soft-bristle toothbrush and a gentle touch. Ensure your water flosser is on a comfortable pressure setting. If irritation persists, consult your dental professional. They can check for underlying issues or adjust your cleaning technique. It’s important to differentiate between temporary irritation and signs of peri-implantitis.
Challenge 3: Food Traps
Certain foods can get easily caught between the prosthetic and gums, or between individual prosthetic teeth.
- Solution: Immediately after meals, especially if you’ve eaten something prone to trapping (like fibrous meats or sticky sweets), use your water flosser to flush out any trapped particles. Carrying interdental brushes or travel-sized water flossers can be useful for on-the-go cleaning. Being mindful of foods that can compromise your dental health is also beneficial, such as those that contribute to 90 percent bone loss in teeth.
Challenge 4: Time Commitment
A thorough all-on-4 dental implant cleaning routine takes more time than simply brushing natural teeth.
- Solution: Integrate your cleaning routine into your daily schedule. Think of it as an investment in your health and the longevity of your smile. Many patients find that once they establish a routine, it becomes second nature. Try listening to a podcast or music while cleaning to make the time pass more quickly. Remember, the effort now prevents significant problems later, avoiding potential issues like those needing a full complete dental implant recovery timeline.
Challenge 5: Uncertainty About Proper Technique
It’s common to feel unsure if you’re cleaning your implants correctly.
- Solution: Don’t hesitate to ask your dentist or dental hygienist for demonstrations. They are the best resource for personalized guidance. During your professional cleaning appointments, ask them to review your technique and offer specific advice tailored to your prosthetic and oral anatomy. Many clinics, like dentalimplantsdallastx.com, offer comprehensive guidance.
| Cleaning Tool | Primary Function | Key Technique | Frequency |
|---|---|---|---|
| Soft-Bristle Toothbrush | Removes plaque from prosthetic surfaces and gently cleans gum line | Small, circular motions, angled 45 degrees towards the gum line. | Twice daily |
| Water Flosser | Flushes debris from under the bridge and around implant posts | Direct stream at 90 degrees to gum line, move slowly along arch, both outer and inner surfaces. | Twice daily |
| Interdental Brushes | Cleans small gaps between prosthetic teeth and around implant posts | Gently insert and move back and forth; use appropriate size. | As needed, daily |
| Specialized Floss | Cleans under the bridge and around implant posts (complementary to water flosser) | Thread under bridge, use shoe-shine motion; gentle to avoid gum damage. | As needed, daily |
| Non-Abrasive Toothpaste | Cleans prosthetic teeth without scratching | Pea-sized amount, gentle brushing. | Twice daily |
| Alcohol-Free Mouthwash | Reduces bacteria, freshens breath | Swish for 30-60 seconds after brushing and flossing. | Twice daily |
By proactively addressing these challenges and maintaining open communication with your dental team, you can ensure your all-on-4 dental implant cleaning routine remains effective and sustainable for many years to come.
Conclusion: Your Commitment to a Lifelong Smile
The decision to receive All-on-4 dental implants is an investment in your health, appearance, and quality of life. Like any valuable investment, it requires diligent care and maintenance to ensure its longevity and continued success. A meticulous all-on-4 dental implant cleaning routine, combined with regular professional dental visits, is not merely a recommendation; it is an absolute necessity.
By adhering to the comprehensive cleaning regimen outlined in this guide – utilizing the right tools, employing proper techniques, and staying vigilant for any warning signs – you are taking proactive steps to prevent complications such as peri-implantitis and safeguard your new smile. Remember that your dental team is your partner in this journey. Do not hesitate to reach out to them with any questions, concerns, or for personalized advice regarding your cleaning routine. Their expertise is invaluable in helping you navigate the specifics of your individual case.
Embrace your all-on-4 dental implant cleaning routine as a vital component of your daily self-care. With dedication and consistency, you can enjoy the many benefits of your All-on-4 implants – from confident eating and speaking to a radiant, healthy smile – for decades to come. Make 2026 the year you master your implant care and cement your commitment to optimal oral health.
References
[1] Renvert, S., & Polyzois, I. (2018). Clinical, microbiological and immunological features of peri-implantitis. Periodontology 2000, 76(1), 18-35
All-on-4 Implant Cleaning Progress Tracker
Stay consistent with your daily and weekly all-on-4 dental implant cleaning routine.
Mark tasks as complete to track your progress!
Leave a Reply
Share your thoughts or ask a question about dental implants. Your email address will not be published.